J-Link Remote Server
Accessing a J-Link remotely
The Remote Server software makes any J-Link accessible from anywhere in the world!
Debug from anywhere in the world!
Direct Mode
Usually, the user's computer connects by USB to a J-Link, which itself is connected to a target in the same office, typically on the same desk. J-Link PRO and J-Trace PRO models can also connect via Ethernet, allowing the target to be anywhere in the LAN, with the J-Link PRO connected via Ethernet cable or Wifi (using a WiFi bridge).
LAN Mode
Remote Server's LAN Mode allows the user to connect to a J-Link (and thus its connected target device) over a local area network (LAN). This is ideal for big target hardware that cannot be moved, or for test farms where multiple J-Links are installed.
Tunnel Mode
Remote Server's Tunnel Mode allows the user to connect to a J-Link (and thus its connected target device) over the internet. This means a device located anywhere in the world can be debugged or brought up. One sample use is to gain early access to a new device, such as silicon sitting on distant hardware, where physical shipment is unfeasible. There are also many applications for cloud based services.
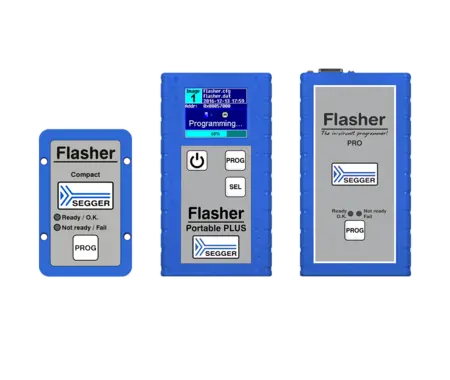
Remote Server is also, of course, compatible with SEGGER production programmers, Flashers, allowing full control of the Flash programmer, including the ability to perform remote programming. This saves the time and money of moving hardware or people.
How it works
In both LAN and Tunnel Modes, the J-Link is first connected to a remote PC, via USB or IP, and the Remote Server is started on that PC. From then on, the J-Link is accessible from any IDE (Integrated Development Environment) as if it were directly connected to this PC.
How to Use the J-Link Remote Server
In LAN mode
The J-Link software used by the IDE establishes a direct connection between the IDE and the J-Link Remote Server (which translates the IP traffic into USB commands). In this mode, the J-Link is not accessible from outside the LAN, unless the firewall etc. is explicitly configured to allow incoming connections etc. .
In Tunnel mode
The J-Link Remote Server connects to a Tunnel Server that then manages all connections. From then on the Tunnel Server waits for a client to connect and request a connection to the J-Link.
On the IDE side, it is as if the J-Link were connected directly to the PC. A one-time-setup tells the J-Link software to establish a tunnelled connection. Optional credentials may be used to protect the connection.
The J-Link software on the IDE side then establishes a connection to the Tunnel Server and identifies the J-Link to connect to by providing either the S/N or a customer chosen name. The Tunnel Server now checks for a registered Remote Server instance and checks that the credentials match.
The Tunnel Server then forwards the traffic between the client (IDE, etc) and J-Link Remote Server. No side is directly connected to the other and therefore neither side is vulnerable.This procedure makes it possible to connect to, and debug, targets behind firewalls.
Customer-Operated Tunnel Server
The default tunnel server is one operated by SEGGER. It can, and does, handle thousands of connections simultaneously. This tunnel server can be used by any J-Link user free of charge.
Customers can also run their own tunnel server if desired. For large corporations, it is not uncommon to have a policy requiring that connections be established only using their own infrastructure.
Such companies can acquire the SEGGER source code, configured to run on the command-line, for a fee, and run their own tunnel server.
How it is secured
The J-Link Remote Server makes it possible to have secure connections. A connection can be password secured to make sure the remote connection is used only by the authorized client.
Authentication is performed via CHAP ensuring the password is never visible on the wire and thus cannot be sniffed.
Additionally, encryption can be enabled to ensure that the transferred data cannot be sniffed from third parties or similar. This is especially useful when working with commercial sensitive information or similar.
How it is used
Setting up the J-Link Remote Server is very easy:
- Connect the J-Link to be remotely accessed to a PC via USB or IP
- Download the J-Link Remote Server application (part of the J-Link software package)
- Start the Remote Server
- Select the appropriate mode (LAN or Tunnel) - in this example, a tunneled connection is used
- For a tunneled connection select a server (jlink-europe.segger.com or jlink-asia.* or jlink-america.*)
- Specify credentials
- Click "OK"
- A client can now connect to the J-Link remotely
Example: Connecting to a remote J-Link using the J-Link Commander
Let's connect to the remote J-Link, which is potentially a couple thousand miles away.
We use J-Link Commander as a test client here, but it could be any IDE (e.g. SEGGER Embedded Studio)
Start the J-Link Commander and enter the connection settings when prompted.
Alternatively, the connection string from the Remote server can be used as a command:IP tunnel:<SN/Name>[:<Password>[:<TunnelServer>]]
After the client has successfully connected to the J-Link via J-Link Remote Server, the J-Link Remote Server will show an active client connection:
From now on, the J-Link can be used by the client as if it was connected directly to that without any limitations.
It's that easy.
For more examples and a troubleshooting guide, refer to the SEGGER Wiki.
GUI or command line
J-Link Remote Server is available as a GUI application and as a command line application. Both versions are available, cross-platform, for Windows, macOS and Linux, meaning the server can be run on a desktop PC, or even a headless system like a Raspberry Pi, without graphical user interface.
Licensing
The J-Link Remote Server is part of the J-Link Software and Documentation Package and is available in a GUI or command-line version. The software package is free for any J-Link or J-Trace device and can be downloaded here:
System requirements
Supported OS | |
---|---|
Windows | Microsoft Windows (x86/x64) |
macOS | macOS (x86/Apple Silicon) |
Linux | Linux (x86/x64/Arm) |
FAQ
Q: Can I use the remote connection with Embedded Studio?
A: Yes. The wiki contains a brief instruction for Embedded Studio.
Q: Can I use the remote connection with IAR Embedded Workbench IDE?
A: Yes. The wiki contains a brief instruction for IAR Embedded Workbench IDE.
Q: Can I use the remote connection with GDB / Eclipse?
A: Yes. The wiki contains a brief instruction for GDB/ Eclipse.