emPower - Getting Started
Congratulations! You now have the SEGGER emPower eval board on your desk.
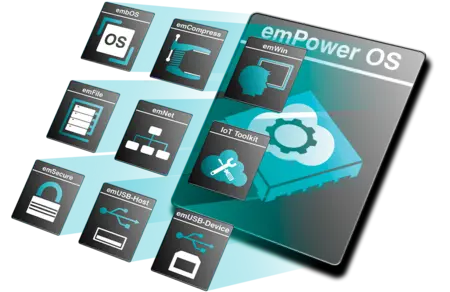
The emPower eval board provides a comprehensive set of SEGGER’s middleware products, accelerating the start of any embedded project. SEGGER’s embOS real-time operating system is at the heart of the evaluation. Furthermore, evaluation versions of the file system emFile, graphics library emWin, emUSB-Host & Device, and TCP/IP stack emNet (including web server demo) enable full use of the available emPower peripherals.
emPower also features a J-Link OB, an on-board version of SEGGER’s market-leading debug probe J-Link. There are three expansion interfaces to easily connect additional modules. Each connector provides I2C, SPI, UART, GPIO/timer, analog input and power. A display adapter connector enables the connection of small TFT displays. The emPower board is powered by USB only. Current consumption drawn strongly depends on the application and connected peripherals. Idle consumption is approx. 85 mA.
Setup and first Run
Connect the emPower Display Add-on to the Display adapter connector ("DISPLAY").
Use the Mini-USB to power the emPower board and to communicate with the J-Link on-board debug probe. Optionally connect emPower via Ethernet ("ETH").
The SEGGER emPower eval board comes with a pre-loaded software package for evaluation and demonstration of our middleware components. SEGGER eval packages are designed to provide customers with a complete and easy to use software package. On power up the SEGGER Demo is running on the LCD, which shows some features of emWin, SEGGER's controller-independent graphical user interface (GUI).
If the emPower eval board is connected via Ethernet, it can be accessed with a VNC Client.
The emWeb Webserver is also part of the SEGGER Demo. Connect to emPower with any browser. The IP of the emPower eval board is shown on the first slide of the SEGGER Demo.
Additional Software
SEGGER Embedded Studio is a complete all-in-one solution for managing, building, testing and deploying embedded applications. It can be evaluated for free.
SEGGER SystemView allows comprehensive insight into the runtime behavior of an application. SystemView is already integrated into the SEGGER Demo and can be used out-of-the-box.
SEGGER Evaluation Package
The SEGGER Eval software for emPower includes the SEGGER Demo as well as evaluation versions of embOS, emNet, emFile, emWin, emUSB-Host and emUSB-Device. The SEGGER Demo is included as a pre-built binary and can be downloaded to the emPower eval board via the debug interface. The SEGGER middleware can be evaluated with the SEGGER Embedded Studio project which includes a whole lot of sample applications to enable full use of the emPower peripherals.
Download the emPower Eval software for SEGGER Embedded Studio
Getting Started with emPower and the Additional Software
To use emPower with the J-Link Software or with a debugger, install the latest J-Link Software and Documentation Package, which includes the USB driver for the on-board J-Link of the emPower eval board. After installation the Kinetis K66 target MCU on emPower can be accessed through the SWD debug interface.
Analyzing the SEGGER Demo with SystemView
SEGGER SystemView is a powerful real-time recording and visualization tool for runtime behavior analysis of an embedded system. It records data in the embedded application and visualizes the information on the host PC to show task execution and interrupts as well as OS API calls.
The SEGGER Demo which is running on emPower is already instrumented with the SystemView target module and allows monitoring it.
Connect the emPower eval board to the PC and start SystemViewer. Select Target -> Start Recording (F5). Make sure theMK66FN2M0xxx18 is selected as Target Device and the target interface is set to SWD and 2000 kHz. Click OK.
It can be seen what is running in the SEGGER Demo on emPower: The 1ms SysTick interrupt, the embOS Scheduler, an embOS software timer, and the tasks for emWin and emNet. For more information about SystemView and a walk-through have a look at theSystemView User Guide.
Evaluating SEGGER Middleware with Embedded Studio
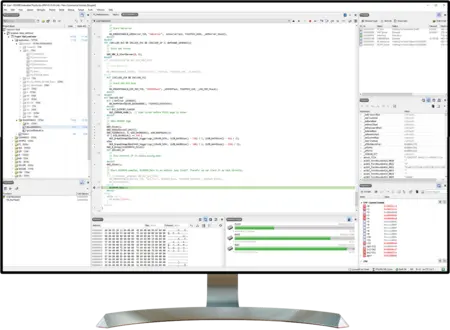
SEGGER Embedded Studio is a complete all-in-one solution for managing, building, testing and deploying your embedded applications: From the Project Generator which gets you easily started with common ARM microcontrollers, to the powerful Project Manager and source code Editor, the included C/C++ Compiler and the integrated Debugger with advanced debug information windows and direct J-Link integration, right through to version control features for automatic deployment of your applications.
The SEGGER Eval software for emPower includes the SEGGER Demo as well as evaluation versions of embOS, emNet, emFile, emWin, emUSB-Host and emUSB-Device. It comes with an Embedded Studio project, which includes sample applications for all middleware components and allows evaluating their features in new applications.
To get started download and install SEGGER Embedded Studio and download the SEGGER Eval software for emPower.
Open emPower_K66.emProject from the Start directory in the Eval software with Embedded Studio. Double-click on the Solution 'emPower_K66' and select the Application folder. Per default the SEGGER Demo, which is also running on the emPower eval board is selected. It can be rebuilt, downloaded to emPower and debugged: Build -> Build -> Build emPower_K66 (F7), Target -> Connect J-Link, Debug -> Go (F5).
To evaluate one of the other applications, right-click on the SEGGERDEMO folder -> Edit Properties... -> Build, and change 'Exclude From Build' to 'Yes'. Cut an application source (i.e. OS_StartLEDBlink.c) from Application/Excluded and paste it into Application. Now rebuild the project and start debugging.
For detailed description and instructions on the SEGGER Eval software have a look at Getting Started with SEGGER Eval Software.
How to program pre-built (binary) demos
J-Flash LITE
J-Flash Lite is a free, simple graphical user interface which allows downloading into flash memory of target systems. J-Flash Lite is part of the J-Link Software and Documentation package, available for download here.
How to perform downloading into flash via J-Flash Lite:
- Make sure that the latest J-Link software & documentation pack is installed.
- Connect the emPower on-board J-Link to the PC
- Start J-Flash Lite
- Select device (MK66FN2M0XXX18), debug interface (SWD) and communication speed (2000)
- Choose the file (emPower_K66.bin) and click Program Device
- J-Flash Lite performs the requested operation
- Press the reset button on the emPower board